The first step is to understand the difference between a Workspace and a Folder.
Folders: Shared folders are ‘read only’ which means users can view the files and add comments if they have been given permissions.
Workspaces: Shared workspaces lets team members upload and share files from within the Workspace. The storage quota goes from the primary account, and not from their free 100MB account. This allows team members to upload revisions, manage folders in the workspace and even delete files.
This allows your full team to work on assets in a single place. Use workspaces as campaigns, client names or asset names. You can share multiple Workspaces with multiple users.

Step 1: Creating a Workspace
Click the ‘+ New’ button in the top left and select ‘Workspace’

A purple colored folder gets created. That is the Workspace
![]()
Step 2: Sharing a Workspace
This is similar to sharing a file or folder. You can share a Workspace with multiple team members or users.
Everyone becomes an owner and has rights to create folders, upload files or revisions and share them with reviewers.

Step 3: This is more of a note
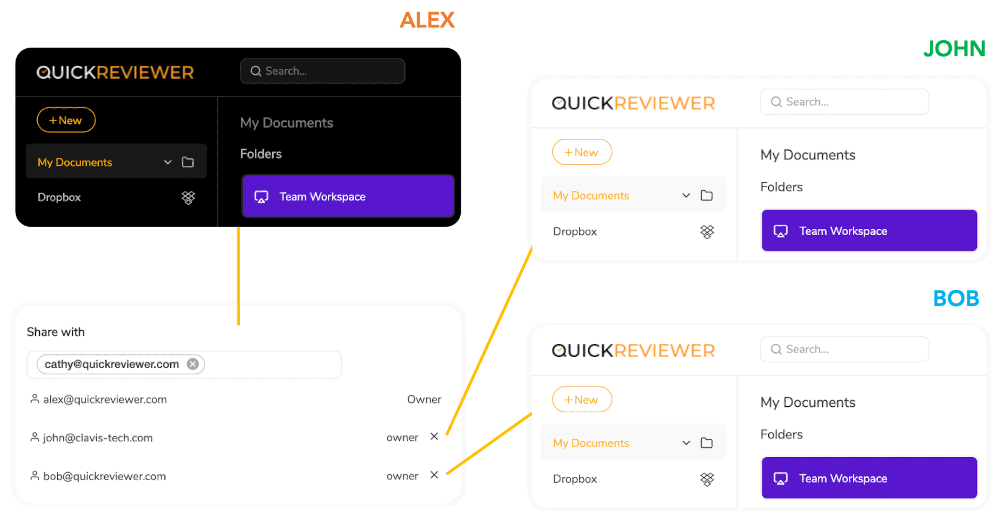
All shared Workspaces appear in the My Documents section of the users you share the Workspace(s) with

Here is an example of a workspace that Alex has shared with John and Bob. All three
Teams
Even when you create a team, you can share complete access of all files and folders you have created, or just a specific workspace. To learn more about managing teams, visit the Teams page in the knowledge base.


